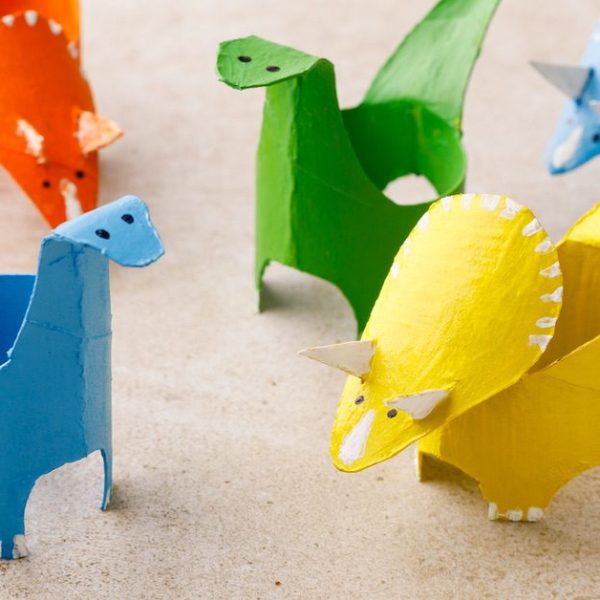
Transform your Christmas tree with adorable homemade dinosaur ornaments! Quick to make and perfect for dino loving kids.

How to Make Dinosaur Ornaments
- Add the hooks: Screw eye hooks into the backs of the dinosaurs.

- To assemble: Thread ribbon through the eye hooks.

- Enjoy: Hang the dinosaur ornaments on your tree.
Storing and Reusing Instructions
To Store: Once the dinosaurs served their purpose, remove them from the tree, gently wrap them in some cloth, and store them in a box with your other ornaments until next year.
To Reuse: You can also remove the ribbons and hooks and let your kids play with them to their heart’s content. If the holes the hooks left bother them, simply fill the holes with a bit of hot glue and paint the same color as the dinosaur to hide them.

Ornament Variations
Glitter dinosaurs: Swap plastic dinosaurs for foam or cardboard ones. Coat them with glue and sprinkle glitter all over. Let dry before punching a hole (or adding the eye hook for the foam dinosaurs) and adding the ribbon.
Dinosaur fossils: Instead of dinosaurs, use air-dry clay to make fossil imprints. Roll out the clay, press in toy dinosaur shapes, and let them harden. Add eye hooks and ribbon to hang.
Fabric dinosaurs: Cut dinosaur shapes from felt or fabric scraps. Sew or glue two pieces together, leaving a small opening. Stuff with cotton and sew shut. Sew the ribbon onto the dinosaurs and tie it to a tree branch.
Painted dinosaurs: Paint plastic dinosaurs with acrylic paints. Let dry completely before adding eye hooks and ribbon. You can even add details like stripes or spots for extra flair.
Recycled dinosaurs: Cut dinosaur shapes from old cereal boxes or cardboard packaging. Decorate them with markers, paint, or stickers. Punch a hole for the ribbon to go through and add the ribbon.
Clay dinosaurs: Mold dinosaurs from oven-bake clay. Follow package instructions for baking. Once cooled, insert eye hooks and thread with ribbon. You can paint them for extra detail.
Dino dough ornaments: Make salt dough and shape it into dinosaurs. Bake until hardened, then decorate with paint or markers. Insert eye hooks and attach ribbon for hanging.
Pom-pom dinosaurs: Create dinosaur shapes using colored pom-poms. Glue them together to form the body and head. Add googly eyes and a pipe cleaner tail. Glue the ribbon directly onto the pom pom to tie the dinosaur to the tree.
Beaded dinosaurs: String small beads onto wire to form dinosaur shapes. Twist the ends to secure, leaving a loop for hanging. Add the ribbon to the loop for a colorful ornament.
Origami dinosaurs: Follow online tutorials to fold origami paper into dinosaur shapes. Carefully punch a hole and then thread it with ribbon for hanging. These make unique and intricate ornaments.
Homemade Dinosaur Ornaments

Materials
- small dinosaurs
- small eye hooks
- ribbon
Instructions
- Screw eye hooks into the backs of the dinosaurs.
- Thread ribbon through the eye hooks.
- Hang the dinosaur ornaments on your tree.
Notes
- Painting caution: Allow painted dinosaurs to dry completely before handling to avoid smudges or smears.
- Glue advice: Use a strong adhesive when attaching the eye hooks to ensure they stay in place securely.
- Ribbon length: Cut the ribbon into desired lengths before threading through the eye hooks for easier handling.
- Hanging tip: Tie a secure knot at the ends of the ribbon to prevent the ornaments from slipping off branches.
- Supervision reminder: Adult supervision may be required when using scissors or handling small objects to ensure safety.
- Drying time: To prevent damage or mess, allow any glue or paint used on the ornaments to dry fully before hanging.
- Storage suggestion: To maintain their quality, store finished ornaments in a safe place away from moisture or direct sunlight.
- Personalization option: Add stickers or paint details to personalize each dinosaur ornament for a unique touch.
- Experimentation encouragement: Feel free to get creative with different colors, materials, or ornament shapes to customize your tree decorations.